Impressive digital wedding invitations & e-cards
Essential e-card tips for stylish and professional communications
E-cards are a great way to share information with your guests quickly using an impressive, styled design. Whether it’s for a save-the-date, invitation, or just to share an update: it’s easy to create and share an e-card with your guests. To get started, simply select “Create-E-Card”, there are a few card types to help you get started.
Creating an E-card

Using a theme
There are many themes available to choose from, which include background artwork and matching fonts. The live preview shows what your recipients will see. Use the toggles to hide or show sections and use the form to update the content. Optionally, you can also include an action button that appears below your card; this is useful for invitations where you might also ask your guests to RSVP.
Custom designs
If you’re working with a stationer, or already have a design prepared, you can upload your own custom card artwork. Make sure your design includes all the content as custom designs currently only support adding an action button. We recommend your design roughly matches an A5 paper size and is exported in a high resolution to ensure content legibility and while landscape designs are supported, these may be more difficult for your recipients to view on mobile devices.
Sending your e-card
Share a direct link

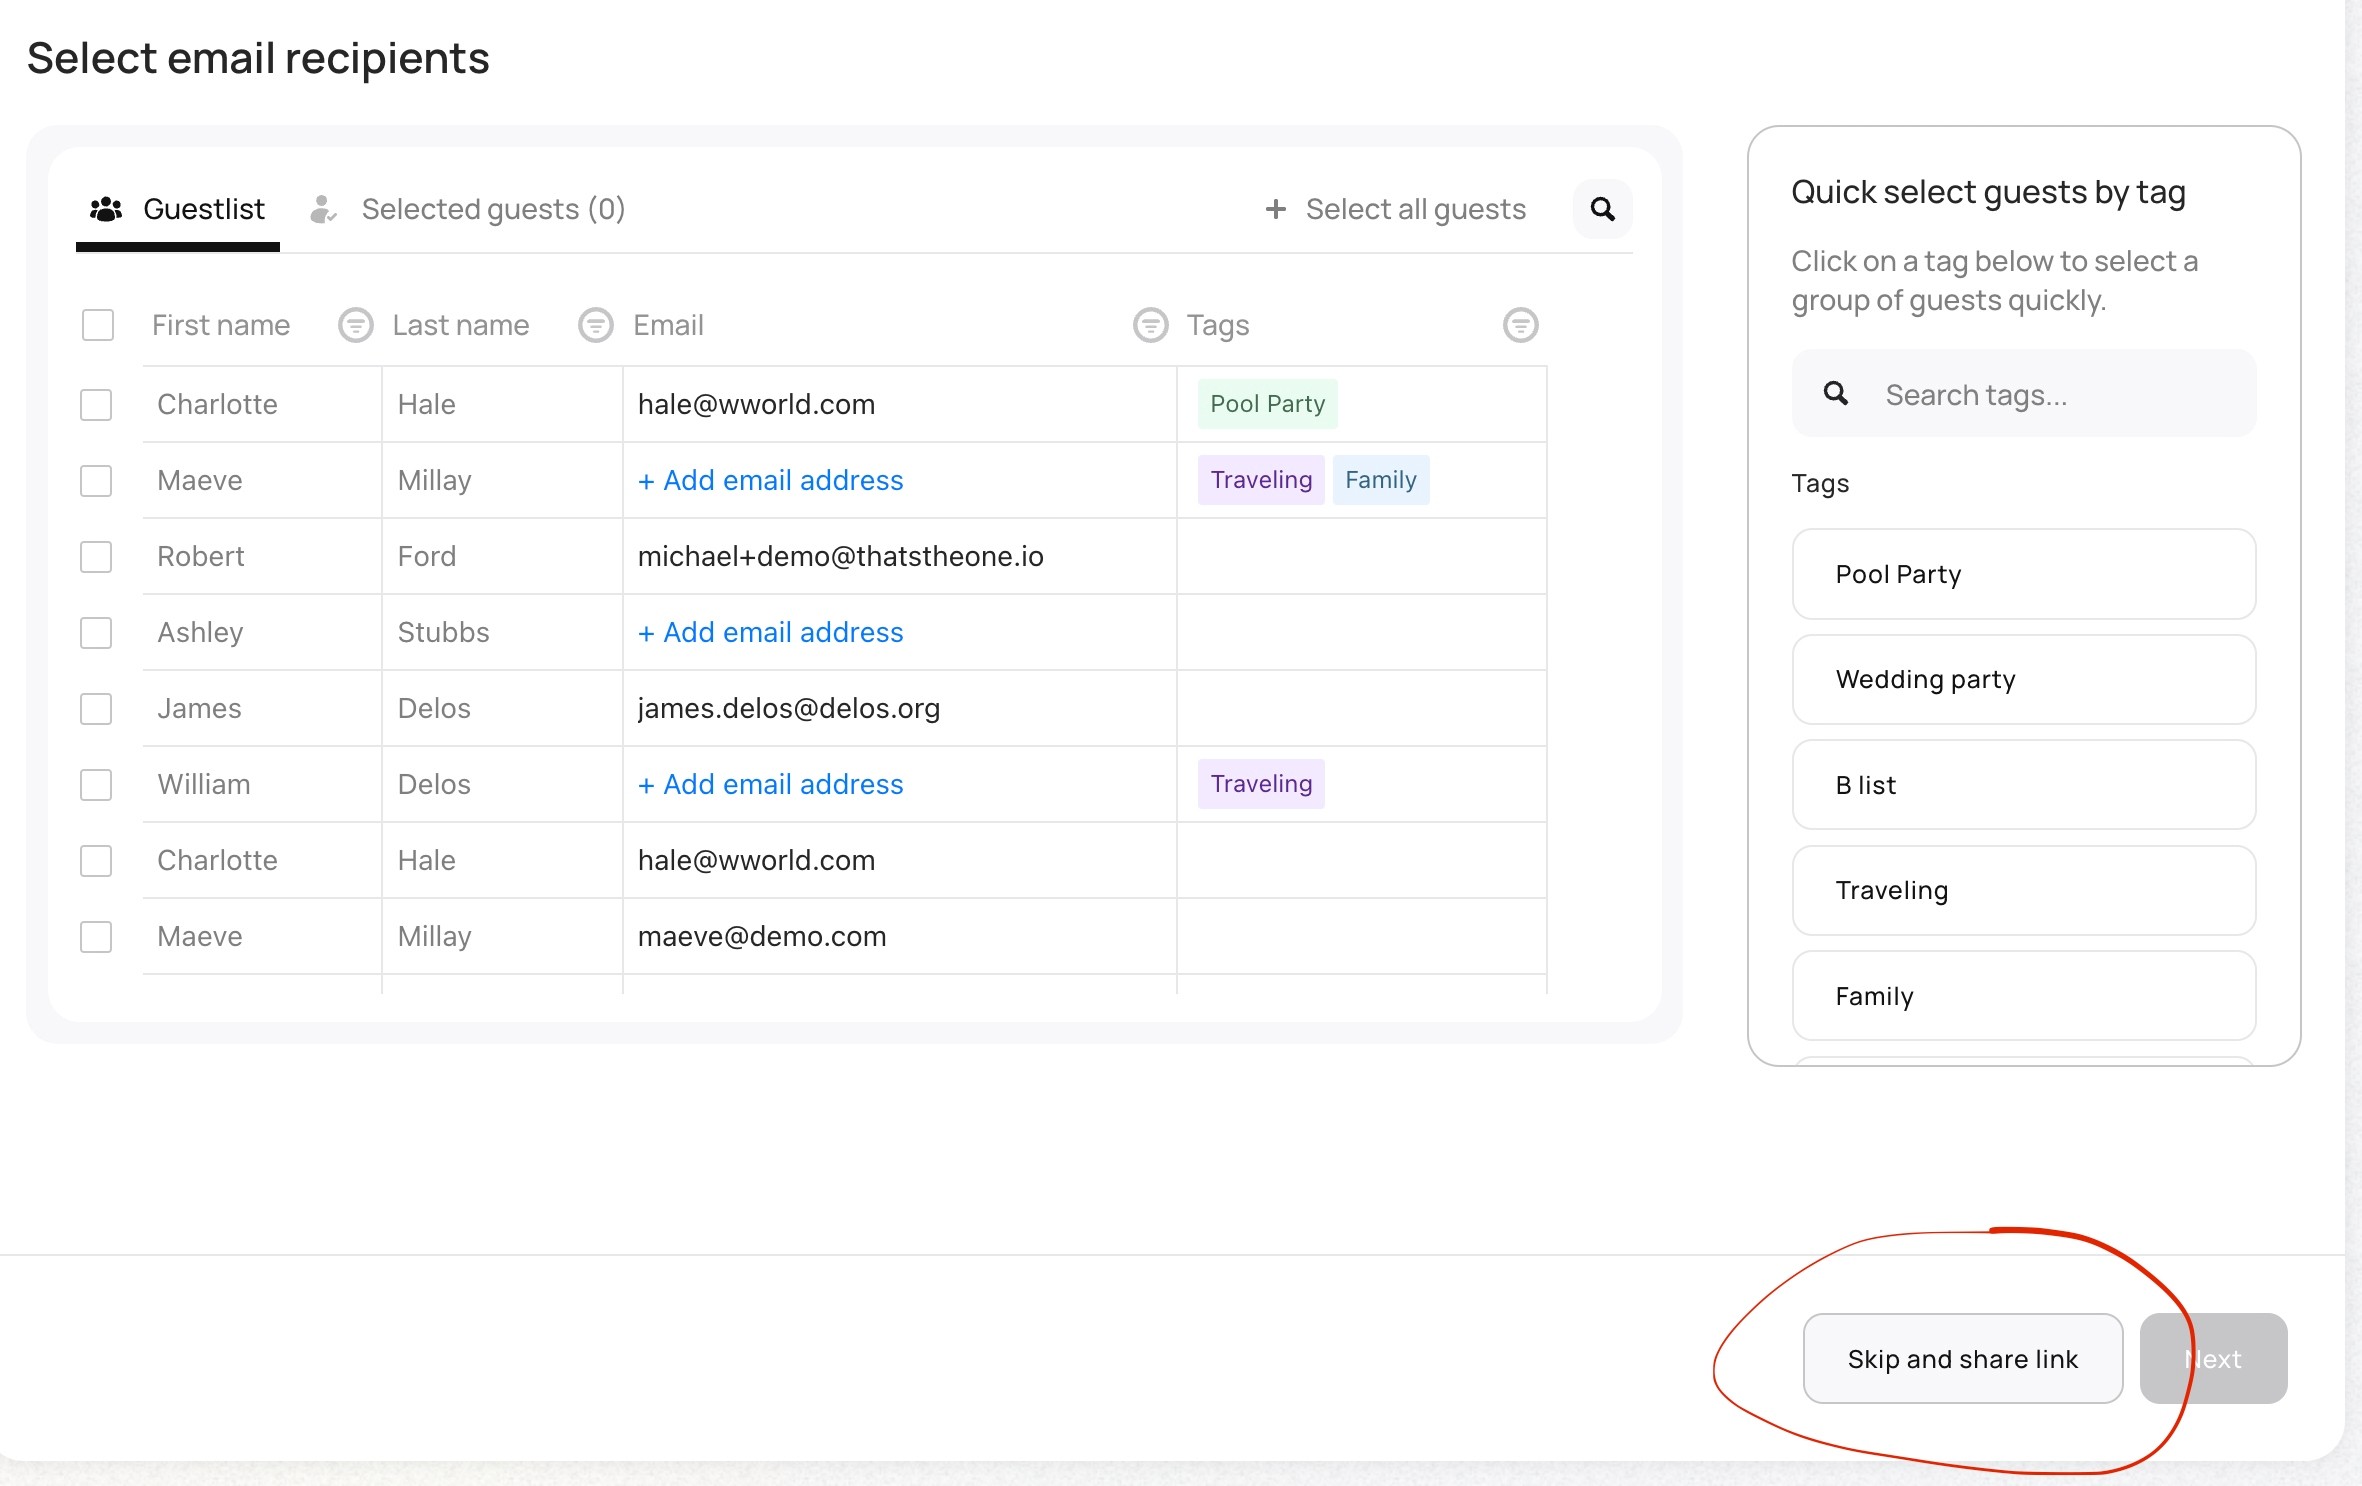
Each e-card has a unique URL that can be shared with your guests directly (such as by SMS/What’sApp). This is useful for guests where you may not know their email address or to create a digital replica for a paper card. If there’s no-one you wish to email this card to, simply select “share direct link” to skip the email composition step — you can return to this step later.
Email to guests

From the table of guests, check which guests you wish to send this e-card to via email. You can select individuals or bulk select by tag. If you spot a guest that’s missing email information, it’s easy to add their address from the selection table (we also highlight the number of guests missing email information in the bottom bar). Once you have your audience selected, the next step is to compose your email message.
The email message is what your guests will see in their inbox before they click through to your card design. Customise the subject line and write an enticing message for them to click through and open your design.
Test and send

Before you send out your card, test the experience by sending the card to yourself (or someone you know). If something needs changing, it’s easy to go back and update any of the content. Once you’re happy with the design press “send”: your e-card will be published and within minutes your e-card will start arriving in your guests inbox. Please note: once an e-card has been published the content can no longer be edited.
Tracking delivery

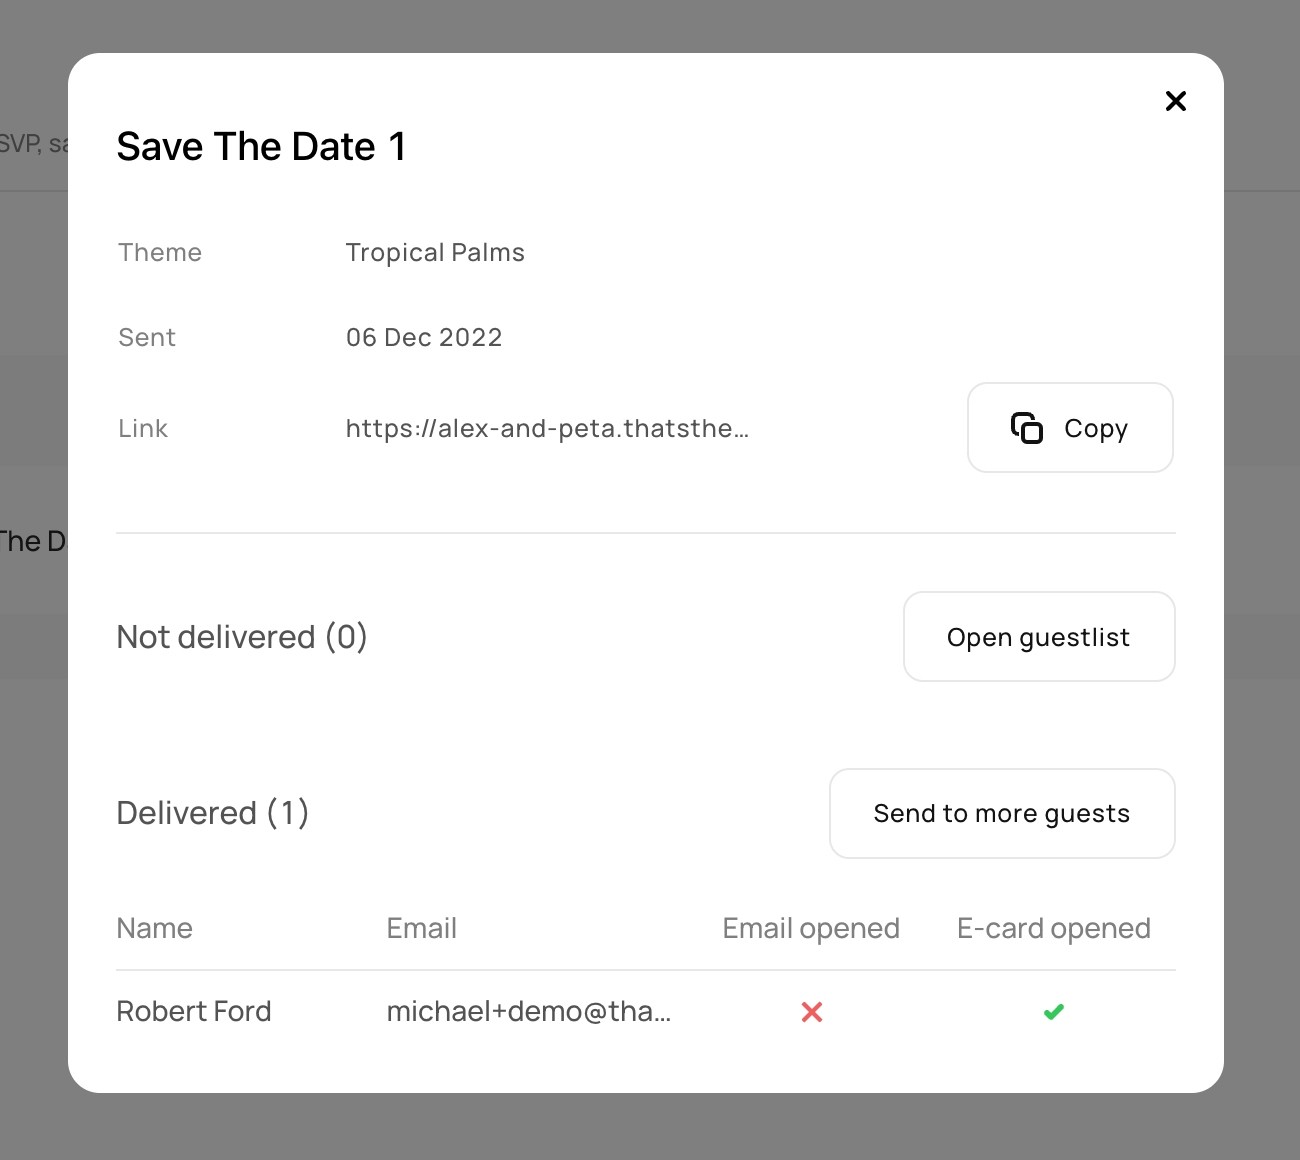
E-cards sent via email come with status tracking that updates every few minutes. To check the status of an e-card, click on the “details” button and scroll down to see the report for each guest. This status can help you understand if a guest has received, read, and opened your message. The list of guests marked “not-delivered” includes guests where the message was not able to be delivered, such as an invalid email address.
Status tracking for “e-card opened” indicates the guest clicked the open e-card button and is very accurate. Status tracking for “email opened” indicates the message was successfully received, however it is not possible to confirm if it arrived to their inbox or junk folder. Guests using an ad-blocker or more private email service may never show a successful email-opened status (use the e-card opened status to confirm delivery).
How do I send a followup RSVP reminder to guests?
Navigate to the ecard section, design the card, click next. On the screen where you see guest emails, in the right hand panel is a section called "attendance status." Select the option called "no reply" and those guests will be automatically selected. Proceed with the next steps of drafting your email and sending the card.
Adding additional recipients

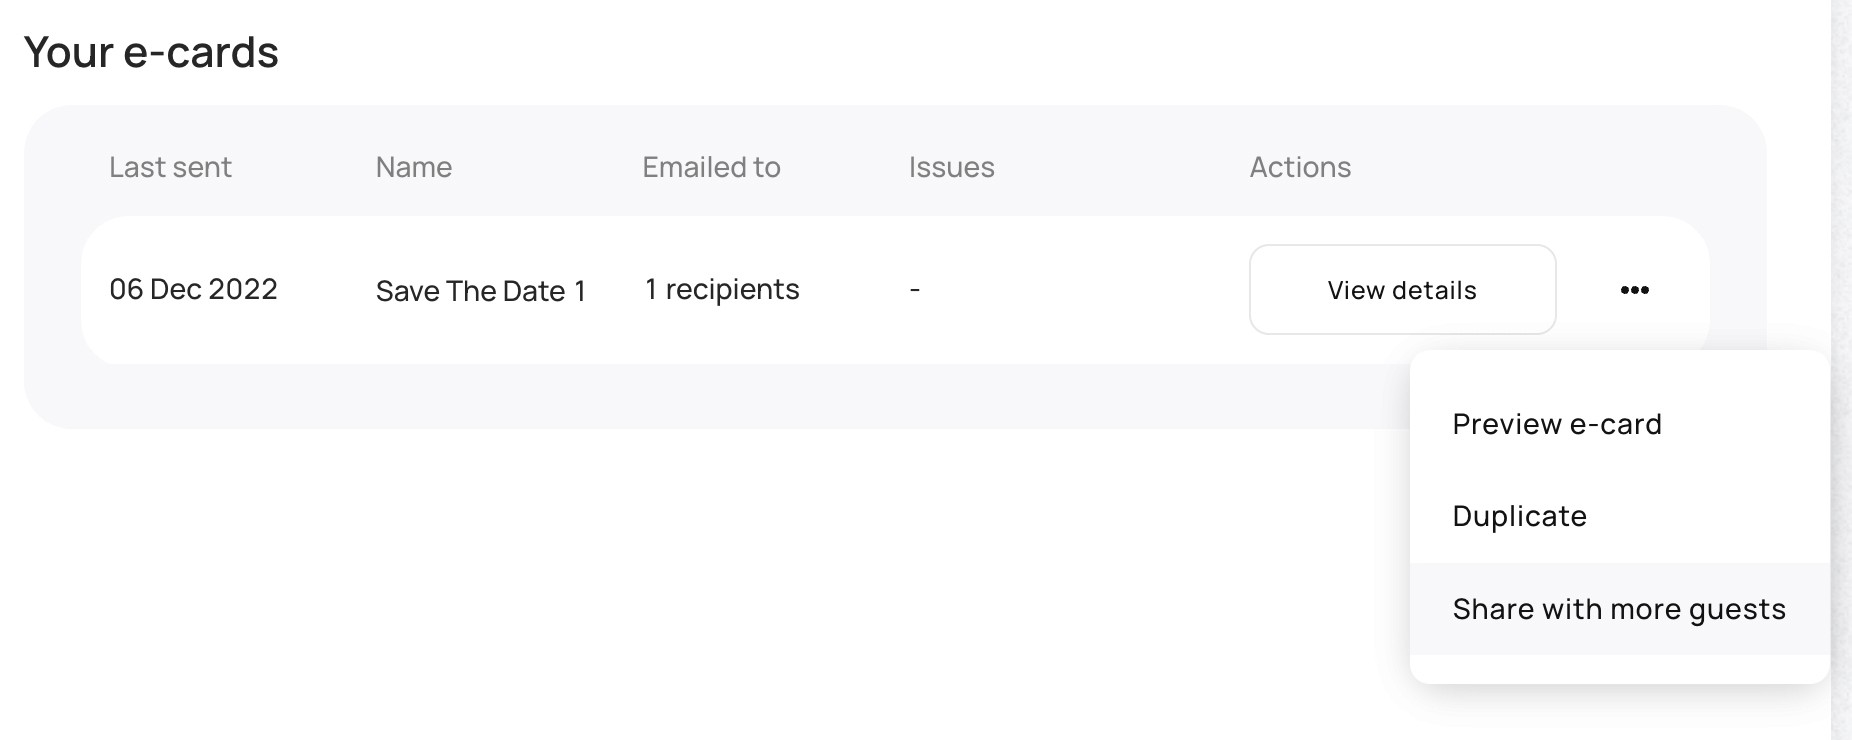
It’s easy to send the same e-card to additional guests. From the E-Card main screen, select the (…) menu on the card you wish to send again. Select “Share with more guests” and you’ll be taken to the recipient selection screen. From here, continue the same steps to send the email to guests as you did the first time.
FAQs:
How do I send a Save The Date Ecard?


